Start before the mud hardens
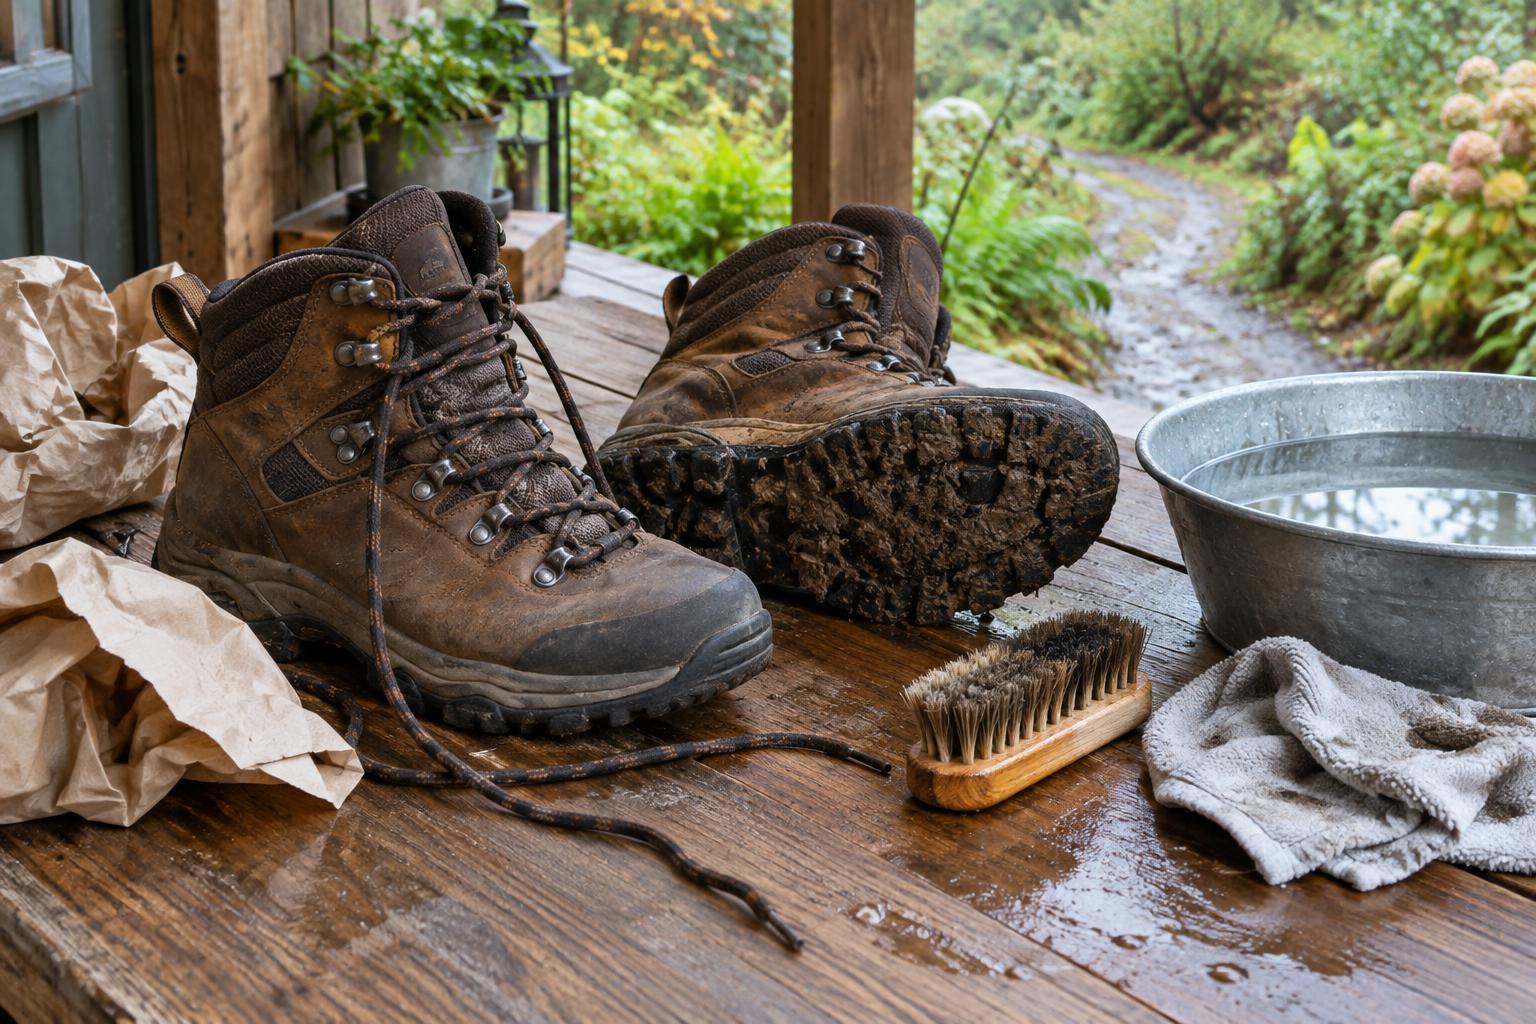
When you get home, take your boots off somewhere that can handle a little mess. Knock the soles together gently or tap them against a firm surface to dislodge loose clumps. Avoid striking the uppers or pulling at the sole edge. Remove the laces and insoles if they are removable; this opens the boot for cleaning and helps trapped moisture escape later.
Use a soft or medium-bristled brush to clear mud from the uppers, seams, tongue and the grooves in the soles. A small brush can reach around lace hooks and into the tread. If the mud is stubborn, dampen it with lukewarm water and give it a moment to soften rather than scraping hard. Grit left in folds and around stitching can rub against the material as the boot flexes, so these areas deserve a careful pass.
Wash the outside without soaking the boot
Once the heavy dirt is gone, wipe the boots with a damp cloth or sponge. For ordinary mud, lukewarm water may be enough. If grime remains, use a cleaner intended for your boot’s material, following its label and the boot maker’s care guidance. Work gently, then remove any cleaner residue with a clean, damp cloth. Avoid strong household detergents, bleach and prolonged soaking, which may be unsuitable for boot finishes or construction.
Pay attention to the type of upper. Smooth leather, suede, nubuck and synthetic fabrics do not all respond to the same products. Suede and nubuck can lose their texture if scrubbed aggressively or treated with products meant for smooth leather. For mixed-material boots, choose a cleaner compatible with each part it touches. Clean the outsole separately with a brush and water, checking the tread for lodged stones. Wipe mud from the laces, or wash them separately if needed.
Dry slowly, inside and out
After cleaning, blot the outside with a towel and leave the boots open in a ventilated place at room temperature. Stand removable insoles nearby to dry separately, and spread out the laces. You can loosely fill the boots with plain paper to absorb moisture and help them hold their shape. Replace damp paper as needed, and remove it once it is no longer drawing out water so air can circulate inside.
Keep boots away from radiators, fires, hot air vents and direct blasts from a hair dryer. High heat may stiffen leather or affect adhesives and other components. A boot that feels dry on the outside can still be damp around the toe or beneath the insole. Before storing it, feel inside and check that the insole and tongue have dried. Drying may take longer after a very wet walk or in humid conditions, so give the process time rather than forcing it with heat.
Restore protection only when it is needed
Cleaning can reveal that water no longer beads on the upper, or that leather feels dry. If your boots call for a conditioning or water-repellent treatment, apply a product suited to their material according to its directions. More is not necessarily better: heavy applications can change a boot’s appearance or feel. Test a product on a small, less visible area if you are unsure how it will affect the finish.
A waterproof membrane, where present, is different from the outer surface treatment. Keeping the upper clean and treating it when appropriate can help prevent the outside from becoming saturated, but a surface spray will not repair a damaged membrane or a leak at a seam. If a boot repeatedly lets water in, inspect it for wear and consult the maker’s care or repair guidance rather than relying on another coat of treatment.
Finish with a quick inspection
When everything is clean and completely dry, put the insoles back and re-lace the boots. Check the soles for worn tread, look for loose stitching or separation where the sole meets the upper, and replace badly frayed laces before they fail on a walk. Store the boots in a dry, airy spot rather than sealing them in a bag while any moisture remains.
The routine need not be elaborate after every outing. On a lightly muddy day, brushing the tread and wiping the uppers may be enough. After a wet, gritty walk, taking time to clean the folds and dry the interior makes the next trip more comfortable and gives you a chance to spot small problems early.