Start with the stove off, cool and disconnected
A little care after each trip is easier than tackling hardened spills just before you leave again. Before cleaning, turn every control fully off and let the stove cool completely. Work in a well-ventilated place away from flames, sparks and smoking. Follow the instructions for your particular stove, especially when removing a fuel canister, bottle or hose. Stove designs differ, and a part that lifts off one model may be fixed in place on another.
Disconnect the fuel only as the manufacturer directs. If you smell fuel, hear hissing or suspect a leak, stop the routine. Turn off the fuel supply if you can do so safely, keep people clear and do not try to light the stove. Have the equipment checked or replace the affected part according to the manufacturer’s guidance before using it again.
Clean cooking surfaces without flooding the burner
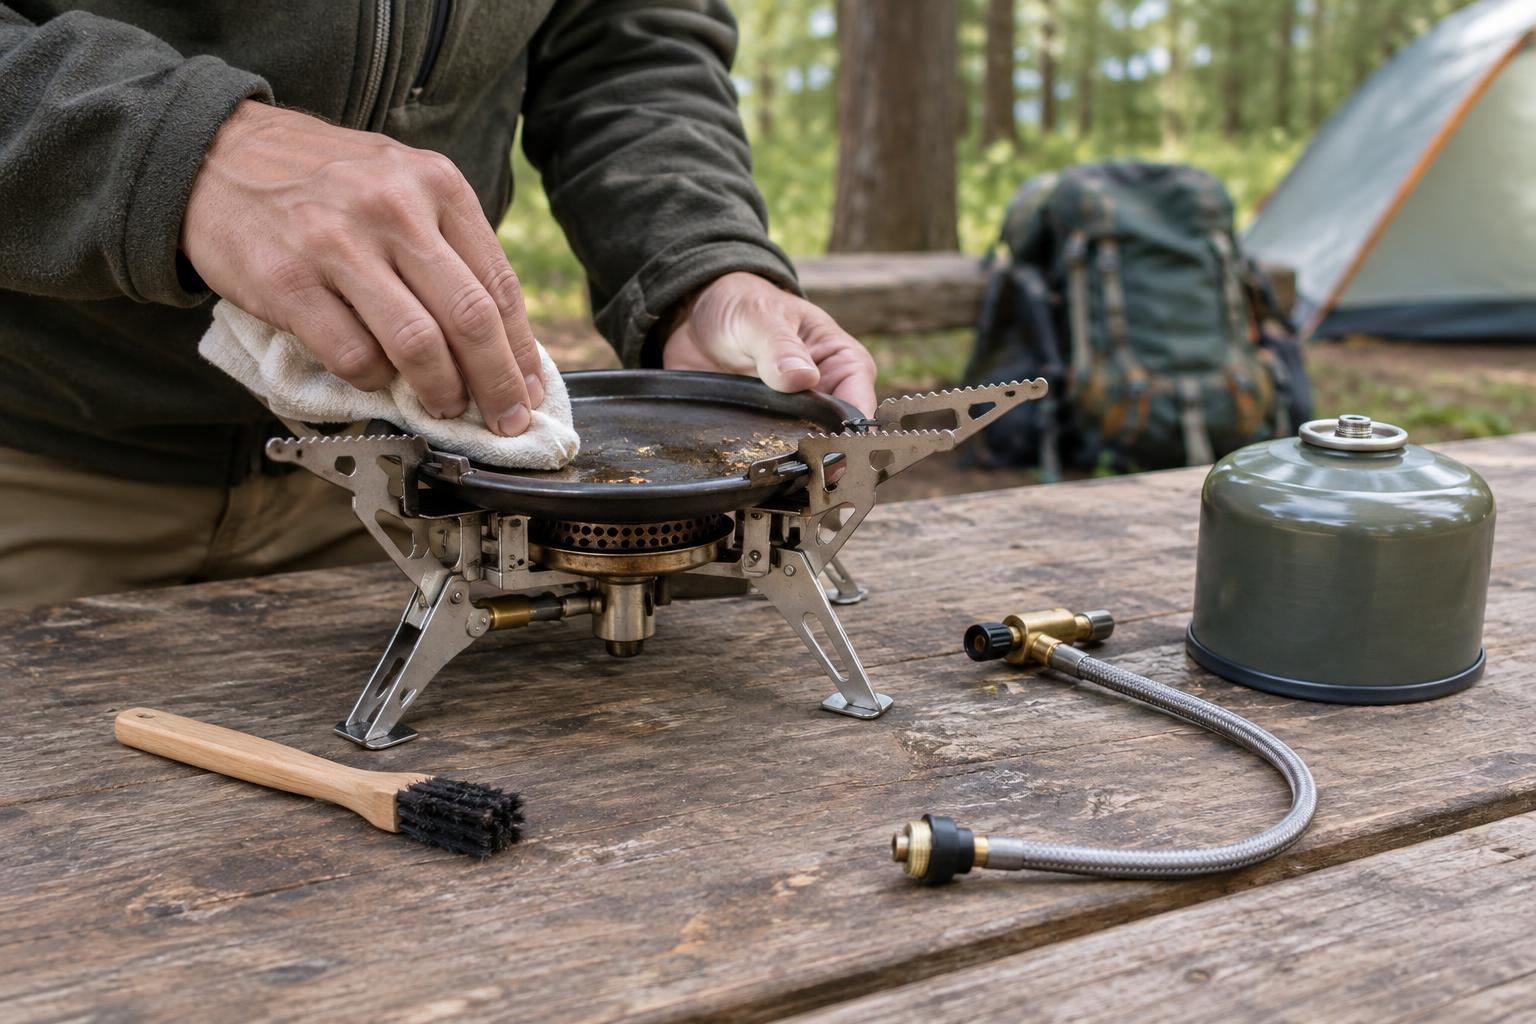
Brush away crumbs, ash and loose dirt with a soft brush or dry cloth. Wipe pot supports, the drip area and other accessible surfaces with a damp cloth and a little mild dish soap, then remove soap residue with a clean damp cloth. A nylon brush can help lift stubborn food from sturdy surfaces. Avoid soaking the stove, spraying cleaner into controls or using abrasive tools that could damage finishes and fittings.
Pay attention to openings around the burner, where boil-overs and grit can interfere with an even flame. Gently clear loose debris from accessible areas, but do not push a pin, wire or other object into a jet or valve unless your stove’s instructions specifically call for that method. Jets are small, and improvised cleaning can damage them or push debris farther inside. If a burner remains blocked, use the approved maintenance procedure or seek a suitable repair.
Let every cleaned part dry fully before reassembly or storage. Check that removable pot supports and shields sit as intended; a loose part can make a cooking pot unstable. If your stove has rust, cracked components or heat damage, cleaning alone will not address the problem.
Inspect hoses, seals and connection points
With the stove off and cool, look over the fuel path before reconnecting anything. On a canister stove, check the stove’s connector and any visible seal for dirt, damage or an out-of-place gasket. On a stove with a separate bottle or hose, inspect the hose along its length for cracks, stiffness, kinks or abrasion, and check the fittings at both ends. Keep grit out of open connections and never force threads that do not engage smoothly.
If a seal looks worn or a fitting is damaged, use the replacement part specified for the stove rather than improvising a substitute. Do not overtighten connections in an attempt to fix a leak. Assemble the stove in the order given by its instructions, using only compatible fuel containers and components. Some liquid-fuel stoves have additional cleaning and pressure-system steps; treat the manual for that model as the guide rather than applying a canister-stove routine to it.
Check for leaks before lighting
Make a pre-use connection check outdoors, with the stove on a stable surface and well away from ignition sources. Confirm that controls are off before attaching the fuel. Once connected, listen and smell for signs of escaping fuel. Where the manufacturer recommends it, a small amount of soapy water on an accessible connection can help reveal a leak: growing bubbles indicate escaping gas. Keep the solution away from burner openings and electrical igniters, and wipe the area dry afterward.
Never use a flame to look for a leak. If you detect one, do not light the stove or try to cook through the problem. Shut off the fuel if safe, follow the stove’s instructions for disconnecting it, and do not use the setup until the faulty connection or component has been addressed. A connection that repeatedly leaks is not made safe by simply tightening it harder.
Store it ready for the next outing
When the stove is clean, dry and disconnected as directed, pack it so the burner and fittings are protected from grit and knocks. Keep fuel containers according to their label instructions, away from excessive heat. Before your next walk or day trip, allow a few minutes for another visual inspection and connection check. That small habit is more useful than assuming a stove is ready just because it worked the last time you used it.