Know what your filter needs
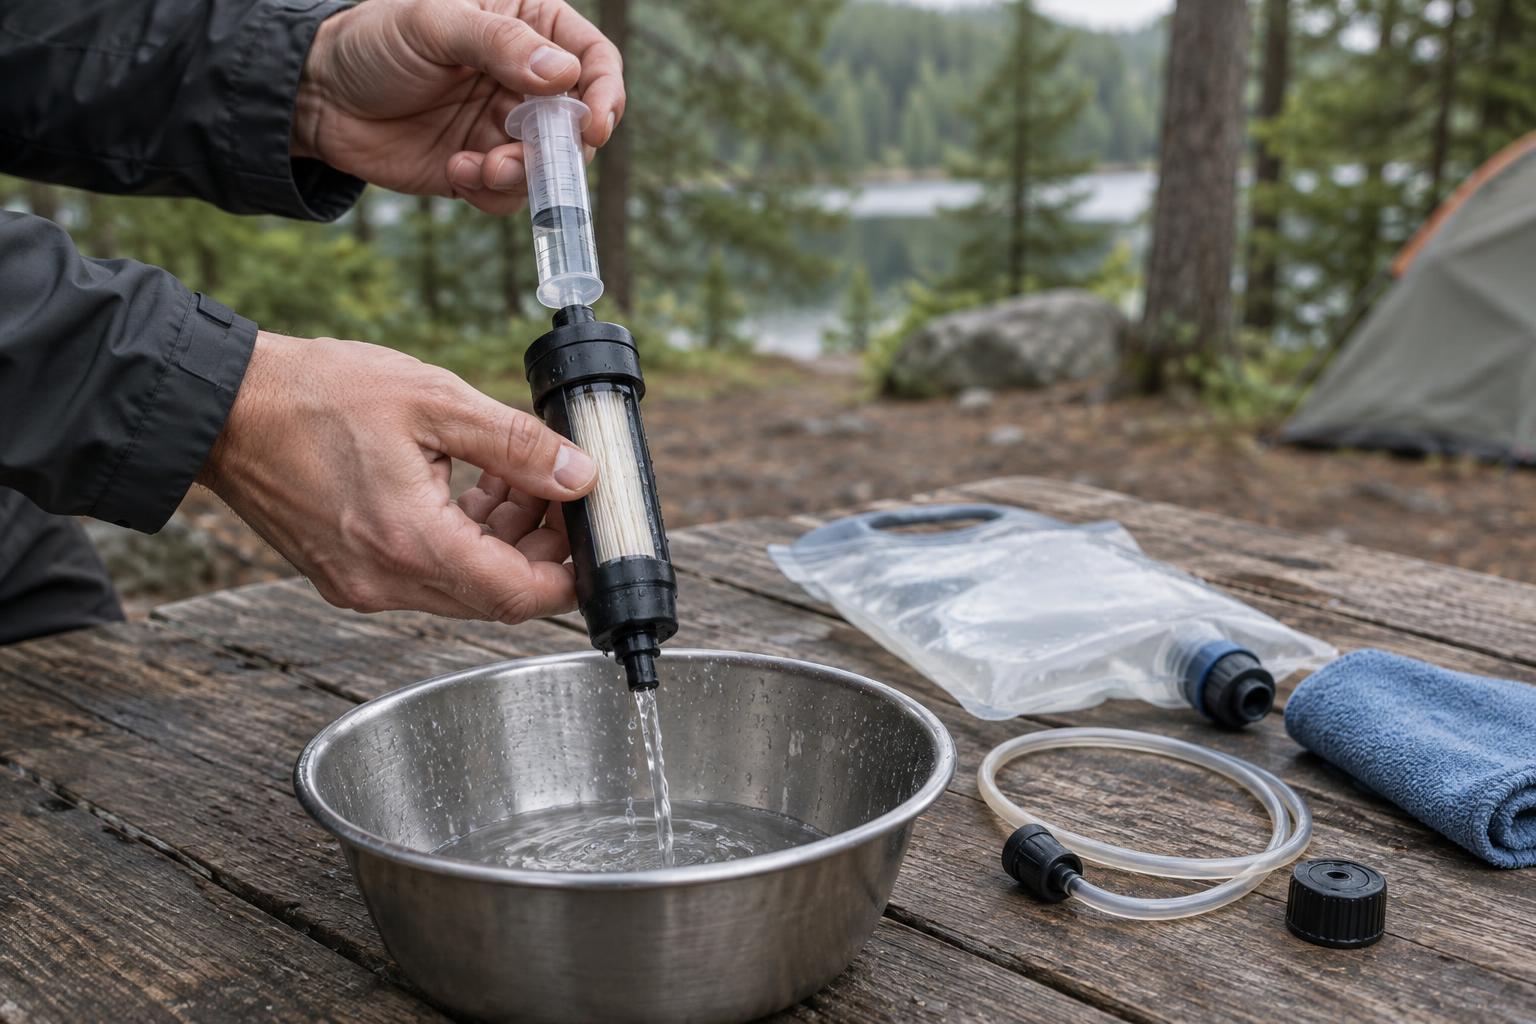
Backflushing pushes clean water through a filter in the opposite direction from normal use. On many hollow-fiber filters, this can dislodge sediment and restore a slower flow. It is not a universal cleaning method. Some cartridges, gravity systems and combination filters require a different procedure or must not be backflushed at all. Identify your model and check its instructions before connecting a syringe, bottle or hose to the outlet.
Pay attention to the parts that touch untreated water and those intended to stay clean. A dirty-water bag, inlet hose and collection vessel can transfer contamination to a freshly cleaned filter if you mix them up. Marking the dirty-water side of a kit can make packing and cleaning less confusing. If your filter has a carbon element or another replaceable component, follow its separate care and replacement guidance; backflushing may not maintain that part.
Backflush without forcing the filter
Begin by washing your hands and clearing visible grit from the filter’s exterior and connectors. Prepare water that is safe to drink, then fill the backflush syringe or other adapter specified for your model. Clean water matters: backflushing with untreated water can introduce contamination to the side that delivers drinking water. If a supplied bottle or bag doubles as the backflush tool, make sure it is clean before filling it.
Attach the tool to the clean-water outlet as directed by the manufacturer. Push water through steadily so it exits at the dirty-water inlet. Repeat if the instructions call for it or if discolored water continues to emerge. Use only the pressure and volume recommended for your filter. Forcing a blocked cartridge, improvising a tight adapter or using a high-pressure tap can damage seals or filter media rather than fix the flow.
A slow filter is not always a dirty one. Cold water can flow more slowly, while trapped air, a kinked hose or a clogged screen may be the real cause. Check those simple possibilities before repeating a backflush. If flow remains poor after the recommended cleaning procedure, consult the model’s troubleshooting guidance rather than increasing pressure.
Clean the rest of the kit
Backflushing addresses material inside a compatible filter, but it does not clean the entire water system. Empty dirty-water bags, rinse away sediment and clean caps, threads and collection containers according to their instructions. Give particular attention to small creases and valves where water can linger. Keep cleaning tools used on dirty-water components away from the clean-water outlet.
Do not assume household soap, disinfectant or bleach is safe for every cartridge. Some manufacturers specify a sanitizing procedure before long storage; others warn against particular chemicals or concentrations. Follow the instructions for your model, including any required rinse afterward. A clean-looking filter can still need sanitizing, and sanitizing cannot repair a damaged cartridge.
Dry and store it as directed
For most trip kits, the first step after cleaning is to drain as much water as possible. Remove detachable hoses and bags, open caps where appropriate and let washable components air-dry in a clean, ventilated place. Avoid putting a damp filter and wet accessories straight into a sealed pouch: trapped moisture can encourage unpleasant odors and make it harder to spot a problem before the next trip.
The right long-term storage method depends on the filter. Some manufacturers recommend drying the cartridge; others specify a particular storage procedure. Check that guidance rather than assuming the cartridge’s interior will dry completely on its own. Keep the kit away from excessive heat, direct sunlight and crushing weight. If a hollow-fiber filter is wet, protect it from freezing. Ice can damage internal fibers in ways that may not be visible, and a normal flow rate afterward does not prove the filter is intact. Follow the manufacturer’s advice if freezing may have occurred.
Check it before the next outing
Before packing, inspect the housing, O-rings, hoses and bags for cracks, missing parts or persistent odors. Assemble the system at home and run clean water through it as instructed. This confirms that the connections fit and gives you a chance to notice leaks or poor flow when replacing a part is still easy. If the filter was stored with a manufacturer-approved treatment, complete any required flushing before drinking from it.
Finally, remember what your particular filter is designed to remove. Portable filters differ in their protection against microorganisms and other contaminants; backflushing does not expand those capabilities. Pack a suitable backup water-treatment method for your plans, and replace a cartridge that has reached its stated service limit or shows signs of damage. A few minutes of careful maintenance can make the next refill simpler without asking a worn filter to do more than it was built to do.